Showing posts with label arts and crafts. Show all posts

Wednesday, September 18, 2013

Ahoy Mateys! (Puppet Craft)

It has been some time since I last did craft with the kids. I was inspired by a puppet craft I saw on Pinterest and also the kids like pirate stuff. That is how the pirate puppet craft came to be. This craft needs toilet paper roll, a nifty idea to recycle and ahem..actually to reduce my ever growing collection of toilet paper rolls in the house. It's going to invade my kids cupboard very soon! 

Ok swaying back to the topic, this pirate puppet craft will be fun to make considering how cute they look and it's really not hard to do. 

You will need the following for the girl puppet:
1. 1 toilet paper roll.
2. Orange paper since I don't have beige.
3. Yellow paper for the hair or whichever hair colour you fancy.
4. Some cloth from any old clothes that you can't fit anymore.
5. Black magic pen.
6. 2 googly eyes.


Draw a straight line on the piece of orange paper and cut according to the line. The strip of orange paper should be a wide strip to make up the face of the puppet. 

Use the glue and paste the strip of orange paper around the top of the toilet paper roll. 

Measure the remaining bottom part of the toilet paper roll so that you can the length accordingly on the cloth. Paste the cloth around the bottom of the toilet roll.


Stick the two googly eyes then draw the nose and mouth with the black magic pen.

Using the toilet paper roll, trace a circle and cut it. Paste the circle right on top of the head to cover the hole. 

Cut strips of yellow paper about 1cm wide and paste it on the head to make the hair. 

And voila! The girl puppet.
You will need the following for the boy puppet:
1. 1 toilet paper roll
2. Orange paper
3. Black felt 
4. Cloth for the top and pants
5. 2 googly eyes
6. Black magic pen
7. White paper


Repeat the same steps as the girl puppet for the face and clothes. Only difference is the puppet has a top and pants now.

Do the same for the googly eyes and face. This time the pirate has a moustache. 

Draw a skull with two bones on a white paper and cut it out. Cut a shape of a pirate on the black felt. You need two pieces to wrap around the puppet's head. Glue the skull and bones onto the hat. And the pirate puppet is ready!

Ahoy Mateys!
Kids at play
So two down  for my toilet paper roll collection and the kids get to do puppet shows, a fun extension of pretend play which can hone some important learning skills like communication skills, social skills, creative skills and language skills. Now excuse me while I go watch their show. ;)

Monday, April 8, 2013

Impromptu Art Lesson Again

As mentioned before my children do not go for formal art lessons. Now that Elizabeth is in Standard 1, they have art subject once every week. So far, the art she took home are very simple drawings and colourings using colour pencils. Then I noticed each time she gets a B for her drawings and I began to realise that maybe the problem lies with her colouring which is flat and there's no shadings. This calls for me to try my hand in teaching her basic shading using colour pencils.


I drew a picture of a bowling pin, a girl and a tree. Then I demonstrated to her how to do shading using just one colour for the bowling pin and got her to finish the rest of the bowling pin herself. Basically, I just taught her to use more pressure when colouring the darkest shade and release the pressure slightly as she move on to the lighter shade. So as to create a darker to lighter perspective.


Then we moved on to the girl and lastly the tree. This time applying different colours like dark green and light green for the tree.


I'm not the best teacher for art, haha. But hopefully she will learn and remember to apply it for her school art lessons next time. Good luck, sweetie.

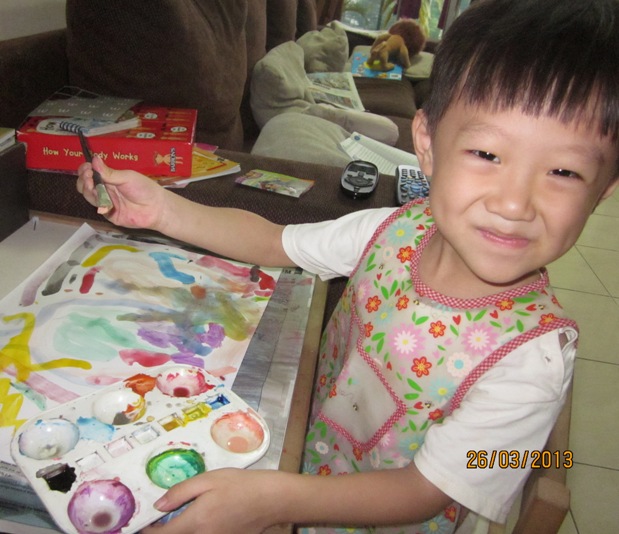
Joseph on the other hand, will always request for a chance to splash some paint whenever he sees his sister is doing art too.

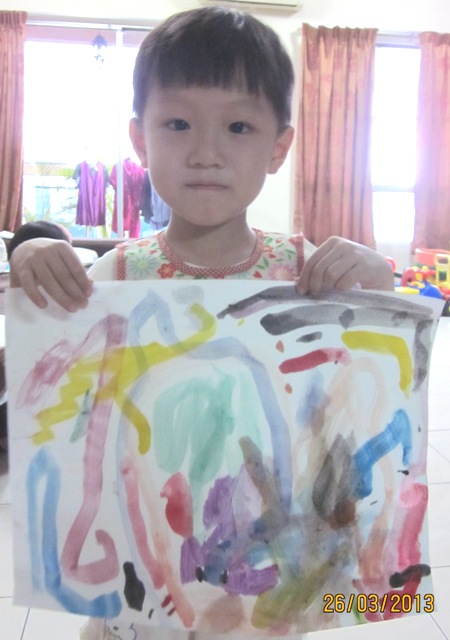
So here's his work of art. Hehe.


Enjoying himself making a mess.

Showing his effort. :)


Wednesday, March 27, 2013

Art Lesson

I did not sign up my kids for any formal art lessons. Maybe I don't want to burden my daughter with too many classes since she is already taking up piano and ballet. There's plenty of resources from the internet and I found this Colourwheel Clown Art Project to introduce the colour wheel to my kids.

First, you find a white card paper. I use a paper plate actually and cut it into a circle and then I drew the lines myself.

Then I asked them to paint the primary colours first. Red, yellow and blue on every alternate pizza slices leaving the other slices empty first. 

Next, I get them to mix the colours on a palette. Red + yellow = orange. So we paint the pizza slice in between the red and yellow, orange. Blue + yellow = green. Blue + red = purple. Same goes to the other slices. 

I then get them to paste the colour wheel on a art paper. Right in the middle. The colour wheel will be the body. Then the kids will have to paint out the face, hands and legs according to their imagination.

 Walla! Elizabeth's masterpiece.

Joseph's masterpiece. That naughty boy just wouldn't leave the clown alone. He enjoyed making it messy.

So that's one project you can do with your kids. Teaching art and some bonding time as well. You can introduce patterns as well like polka dots or stripes to the clown's socks if you like. 


Wednesday, November 14, 2012

A Little Bird Told Me

...that Elizabeth misses Singapore. Why? Check out her drawing.

Fresh from our Singapore trip, Elizabeth drew a picture and I was pretty impressed with it. She must be in the mood because she doesn't draw everyday. Usually her drawings are very basic and simple like stickman, people, bird, house or building. She drew birds also but this time a more complex one which took me by surprise.

Elizabeth proudly showing her drawing.

Before and after. So eager to use the new set of magic pens I got for her. The upper colourful bird is a parrot she said.

Very colourful drawing. Bird inspired from Singapore Zoo I think. Can you spot her 'Singapore train' (MRT)? She calls it 'Singapore train'. Haha. What a colourful train.
Can't wait to see what other drawings she'll come up with next time.

Friday, June 22, 2012

While Papa Was Away Part 3

It was Father's Day but since Papa was away, I planned some crafts for the kids to do. But first, Nutella Fudgesicles to cool their body down. They were in the freezer overnight and should be ready. The kids and I loved it. We saved one for their papa too.

The kids licking away. Nutella Fudgesicles.
Coming up next, we did Father's Day craft as a gift for their papa. For Elizabeth, she did a card in a shape of a shirt with tie. It was actually an idea we got from one of her activity books. As for Joseph, just a simple card that I know he'll enjoy doing and I got the idea from the Internet.

 Use a coloured paper and if it's A4 size, you can fold it into half and glue them together. Cut two vertical lines about 1.5 inches and fold them like step no. 2 at the picture above. It will look like a shirt collar. Draw out a shape of a tie on another coloured paper and cut out the shape. Apply glue only at the top part of the tie and paste it slightly under the collar.

You can stick two buttons at the ends of the collar like the picture above. Then flip up the tie to write something under the tie. Elizabeth wrote "Surprise!!!"

Tada! A cute shirt with tie and buttons on the front.

A message for papa at the back. Just paste any light coloured paper if the shirt is dark coloured and write or draw whatever you want for daddy dearest.

Now it's Joseph's turn. He just had to place his right hand on a paper. Then I'll spray colours around with a toothbrush. So there'll be a shape of his hand on the paper.

Tada! Joseph's card for papa. it smeared a little because he couldn't keep still. I got big jie jie to help Joseph to write a message for papa. This card is good for keepsake so you can compare size of the hand on the card with the size of the hand in the years to come.

After all that hard work, you will never go wrong with spaghetti bolognese for the kids. ;)


Wednesday, June 20, 2012

While Papa Was Away

Last weekend, the hubby was away on a business trip. Leaving me with the kids. :( Sad because we all missed him and we cannot celebrate Father's Day with him. But I've already planned out some activities for the kids. Initially some activities involved going to the playground but that had to be cancelled since the haze was very bad over the weekend.

I guess it's natural to do an art and craft activity. What more than art and craft since kids enjoy them right? We finished off doing a tortoise craft we did halfway because we ran out of green paint! I didn't follow exactly but I got the idea from Disney Junior's website. Here's the steps to do a tortoise!


Draw the tortoise's head, tail and legs on a paper plate. Then cut the shapes out. Stick them on another paper plate.

Put some glue around the sides of the paper plate. Then we stick another paper plate on top so that the head, tail and lets are pressed in between the two paper plates. You can use a paper bowl on top if you want to make the tortoise bulkier. But since we don't have a paper bowl, we just settled with a paper plate instead. Then paint the tortoise green. Use a sponge to make streaks of yellow paint on top of the green paint. Make sure the green paint is fully dry. Otherwise, you can't really see the yellow effect just like mine. Haha.

Paste googlie eyes on the head of the tortoise. Since we don't have glitter, we just use glitter glue to make spots on the body and tail. Red glitter glue for the body and purple glitter glue for the tail. Tada! Elizabeth can't wait to show her papa.

Monday, May 28, 2012

School's Out!

We are into the second week of school holidays already. Normally school holidays would mean that my mother, sister and her brood would be up to KL to spend a few days with us. They came up at the beginning of the school holidays and went home already. They literally came as soon as school was out because they were up by Friday itself! LOL.

While my nephews and my daughter were waiting for their school bells to ring, I was playing the role of a SAHM (like real!) and Joseph got the privilege to do this...

He enjoyed it hysterically and got to paint in peace without squabbling with his sister.
Joseph's masterpiece.
One of the agenda during their trip was to bring them to Menara KL or KL Tower since my mother haven't been there before. Our ticket package was inclusive of the Observation Deck and the Animal Zone. Joseph entered for free and they have senior citizen privileges too. We went up to the Observation Deck first and made a few circles to observe KL city. Your are given a Walkman kind of thing together with earphones upon request if you want a guided tour around the observation deck. But it didn't come in handy and we returned it. Some were either faulty or too soft. I think it is more useful for foreign tourist and not local tourist like us.

Observation deck of KL Tower

One of the many views you can get from KL Tower

And of course the famous Petronas Twin Towers.

The viewer to see the view at a much larger point of view.

My nephews with their Angry Birds t-shirt. *roll my eyes* My beloved mum and me.
Some of the animals in the Animal Zone.

Most unique animal there was this two-headed tortoise. It was quite tiny actually. About the size of my palm.
That pic of my nephew Brandon with parrots actually costed us RM5 to take with our own camera. Everything requires money these days. We went to the Nature Park after that.
It is quite an awesome sight on top of the Observation Deck but I think once is enough just to have that experience. The visit to the Animal Zone was ok but don't expect it to be as big as a zoo. My mum freaked out as soon as she entered because one of the first few animals at the front were the pythons. So she didn't want to enter further thinking that it was all reptiles inside. We had to make our visit short and sweet. We went to the Nature Park after which was free. We came to this park before and I've blogged about it here.

The other place we went was Mid Valley Megamall where we managed to catch the Mickey Mouse Through The yEars creative tributes showcasing Mickey Mouse figurines imaginatively painted on by local artists and some of the participating outlets from Mid Valley Megamall.

This one is so adorable because it's like a miniature of F.O.S. outlet with decorated Mickey figurines.

One of the many large Mickey figurines.
As you can see I'm attracted to the Mickeys with bling blings!
 It was interesting to see how creative people can be with a Mickey figurine. The children enjoyed browsing through the exhibition. You can still catch it though. It seems it will be on till September.

Thursday, May 24, 2012

Mother's Day Card

In case, the card would go missing one day although I will definitely keep it, I decided to record it down into my blog. This year like other years since she went to kindy, my daughter came back with a Mother's Day card she did in school. She showed it to me proudly and wished me.

The front. It's so cute the way she writes her Chinese characters. Haha.

The back. I find it cute and funny with that question there , "Good for you Mummumy(wrong spelling haha)?" From is foam. hehe.
Thank you for your effort, dear Elizabeth. I appreciate the card very much. Mummy loves you very much! I can feel the love..hehe.

On to another story, my two kiddos are like any other siblings. They have their good times and bad times. They can be loving to each other during good times and behave like enemies during bad times. LOL. But there were a few occasions where it shows how much they love each other.

1. When I found out that Joseph did something naughty, his sister would defend him by giving me excuses or reasons on why Joseph did it. She made it sound like he wasn't in the wrong!

2. She gives in to him more than her brother gives in to her.

3. There was once the two squabbled and that left Elizabeth in tears. She ran away crying but Joseph ran after her and quickly apologised, "Sorry Jie Jie. Sorry Jie Jie".

4. Another incident happened when Joseph wanted to paste some stickers from his Thomas and friends sticker activity book. Elizabeth wanted to join in but he shooed her away. So she ran away in tears again. But again he ran after her and said to her, "Come Jie Jie, stick together".

I admit the squabbling I don't like but it's when they make up, it's so sweet to witness it. I'm sure you guys agree with me right?

School holidays are coming. Enjoy your holidays with your kiddos. :)

Joseph's first time attending his sister's Sports Day.

Thursday, March 8, 2012

Fish Craft

I haven't been doing any art and craft with Elizabeth for quite a long time until recently she pleaded with me many times to do one with her. She sounded like a broken record, repeating non stop every few minutes, I had to relent in the end for my own sanity. So while Joseph was having his afternoon nap, we did a fish craft together. It's pretty easy and I got the idea from Disney Junior's website and improvised a little.

You need felts. I didn't have enough felt for the fins and spots so I used foam paper for that. Draw the fish, lips, fins and spots.
Fold the purple felt to cut two fish shapes. Cut the rest too.
Place some cotton wool on one of the fish shape.

Carefully put the fins and lips at the correct part of the fish shape. Apply glue on the other fish shape and stick the two fish shape together (with the cotton wool, fins and lips in between).

Then apply glue on all the spots and stick on both sides of the fish's body.

Lastly, glue two wiggly eyes on each side of the fish. Poke a hole on the upper fin to put a ribbon through and tie a knot to it. Wala! You have a fish to carry or hang it around. See my girl so happy to finally do a craft. It's been so long.


LinkWithin

Related Posts Plugin for WordPress, Blogger...